And most importantly i wish my mummy a very very happy 70th birthday! She is my hero x
So Its half term!!! Hooray!!! If you are anything like me you are nearly finished your main Christmas shopping but still need those personal touches!
Whilst reading a Christmas magazine i came across these DIY Garlands!
This is so effective and so easy for our little people to make too!
Prepare:
1. Cut out 8 strips of card, each the length of the paper and 3.5cm wide.
Create:
2. Fold each strip so that the short edges are together, and crease the lower edge. If using patterned card ensure its print faces out.
3. For each strip, curve the short edges inwards and match up to one another, then use a stapler (or glue dot) to fasten about 0.5cm in from the edge. Repeat to form 8 hearts.
4. Take 2 hearts and line up their folded bottoms. Staple about 4.5cm up from the creased edges. Repeat this to connect all the shapes in a line, then join the outer 2 in the same manner to produce a circle of hearts.
Finish
5. Cut 2 lengths of ribbon and staple an end of each to the curve of a heart, on two neighbouring ones. Tie the free ends of ribbon into a bow, then hang to display.
I think i will sit with Honey, Nick and Rocco and each write a wish and put in our kitchen as a decoration! These also make nice grandparents gifts from the children.
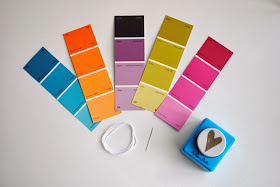
I also love this type of Garland too
I love this garland for a little girl's bedroom or even like a ribbon when wrapping presents!


So cute! Where did you get your heart punch from that is the right size for paint samplers?
ReplyDelete